Honey Glazed Chicken
Introduction
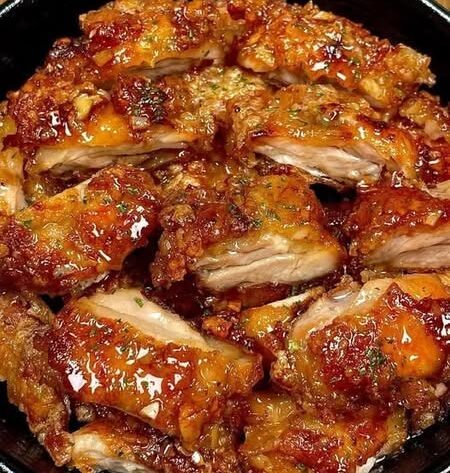
Honey Glazed Chicken is a beautifully balanced dish that combines savory, sweet, and slightly tangy flavors into a glossy, caramelized glaze coating tender chicken pieces. It is inspired by both Asian-style stir-fry glazes and Western honey-based roasting techniques, resulting in a versatile dish that can be made in a pan, oven, or air fryer depending on preference.
The key characteristic of this dish is its sticky, shiny sauce made from honey, soy sauce, garlic, and aromatics that reduces into a rich glaze. When done correctly, the chicken becomes juicy on the inside while the exterior is coated in a flavorful, slightly sticky layer that clings perfectly to each bite.
This recipe is written in a detailed, step-by-step format to help you achieve restaurant-style honey glazed chicken at home with consistent results.
Yield
4 to 6 servings
Preparation Time
20 to 25 minutes
Cooking Time
25 to 35 minutes
Total Time
Approximately 50 to 60 minutes
Ingredients
For the Chicken
2 pounds boneless chicken thighs or chicken breasts
1 teaspoon salt
1 teaspoon black pepper
1 teaspoon paprika
1 teaspoon garlic powder
1 teaspoon onion powder
2 tablespoons cornstarch (for light coating and crispiness)
2 tablespoons oil for cooking
For the Honey Glaze Sauce
½ cup honey
⅓ cup soy sauce (low sodium preferred)
3 tablespoons ketchup (adds color and mild tanginess)
1 tablespoon rice vinegar or apple cider vinegar
1 tablespoon oyster sauce (optional but recommended for depth)
1 tablespoon sesame oil
6 cloves garlic, finely minced
1 tablespoon fresh ginger, finely grated
½ teaspoon red chili flakes (optional for heat)
2 tablespoons water
For Thickening (if needed)
1 tablespoon cornstarch
2 tablespoons cold water
For Garnish
1 tablespoon toasted sesame seeds
3 to 4 green onions, sliced
Optional crushed peanuts for texture
Optional Add-Ins
1 cup bell peppers, sliced
1 small onion, sliced
1 cup broccoli florets
Equipment Needed
Large mixing bowl
Sharp knife and cutting board
Non-stick skillet or wok
Small saucepan (optional for sauce)
Whisk
Measuring cups and spoons
Tongs or spatula
Choosing the Best Chicken
Chicken thighs are preferred because they stay juicy, tender, and flavorful even after high-heat cooking and glazing. Chicken breasts can also be used for a leaner option but require careful cooking to avoid dryness.
Uniformly cutting chicken ensures even cooking and better sauce absorption.
Step 1: Preparing the Chicken
Cut chicken into bite-sized cubes or strips depending on preference.
In a large bowl, season the chicken with:
Salt
Black pepper
Paprika
Garlic powder
Onion powder
Mix well so each piece is evenly coated with seasoning.
Add cornstarch and toss again until lightly coated.
The cornstarch helps create a slightly crisp exterior and also helps the glaze cling better later.
Let the chicken rest for 10 minutes so seasoning absorbs properly.
Step 2: Preparing the Honey Glaze Sauce
In a bowl or small saucepan combine:
Honey
Soy sauce
Ketchup
Vinegar
Oyster sauce
Sesame oil
Minced garlic
Grated ginger
Chili flakes
Water
Whisk thoroughly until fully blended.
The sauce should appear smooth, slightly thick, and aromatic.
Taste the sauce at this stage if desired.
If you prefer sweeter flavor, add a bit more honey.
If you prefer more saltiness, add a splash of soy sauce.
If you want more tang, increase vinegar slightly.
Step 3: Cooking the Chicken
Heat oil in a large skillet or wok over medium-high heat.
Once hot, add chicken pieces in a single layer.
Avoid overcrowding the pan, as this prevents proper browning.
Cook chicken for 4 to 5 minutes per side until golden brown and nearly cooked through.
The exterior should develop a light crust while the inside remains juicy.
If needed, cook in batches.
Remove chicken from the pan and set aside.
Step 4: Building the Sauce in the Pan
In the same skillet, reduce heat slightly.
Add a small drizzle of oil if needed.
Pour in the prepared honey glaze sauce.
Stir continuously for 2 to 3 minutes until it begins to warm and release aroma.
The garlic and ginger will become fragrant and the sauce will start to slightly thicken.
Step 5: Combining Chicken and Sauce
Return the cooked chicken to the skillet.
Stir well so every piece is coated with sauce.
Allow the chicken to simmer in the sauce for 5 to 7 minutes.
During this time, the sauce will reduce and become glossy and sticky.
The chicken will absorb the sweet-savory flavor deeply.
If the sauce becomes too thick too quickly, add a splash of water.
If the sauce is too thin, continue simmering or add cornstarch slurry.
Step 6: Thickening the Sauce (if needed)
If you prefer a thicker glaze, prepare slurry:
1 tablespoon cornstarch
2 tablespoons cold water
Mix until smooth.
Slowly pour into the pan while stirring continuously.
Cook for another 2 to 3 minutes until sauce becomes thick, shiny, and clingy.
Step 7: Optional Vegetable Addition
If adding vegetables such as bell peppers, onions, or broccoli, add them during the last 5 to 6 minutes of cooking.
This ensures they remain slightly crisp and do not become mushy.
Stir gently so vegetables are coated in glaze without breaking apart.
Step 8: Final Flavor Adjustment
Taste the dish carefully before serving.
Adjust according to preference:
Add honey for more sweetness
Add soy sauce for saltiness
Add vinegar for brightness
Add chili flakes for heat
Stir well after adjustments.
Step 9: Garnishing
Sprinkle toasted sesame seeds over the chicken.
Add freshly chopped green onions for freshness and mild sharpness.
Optional crushed peanuts can be added for crunch and nutty flavor contrast.
Step 10: Serving Suggestions
Honey Glazed Chicken pairs well with many side dishes.
Serve over:
Steamed jasmine rice
Basmati rice
Fried rice
Garlic noodles
Egg noodles
Quinoa
Mashed potatoes
It also pairs well with:
Steamed vegetables
Stir-fried greens
Asian-style salads
Roasted carrots or zucchini
Serving warm ensures the glaze remains sticky and flavorful.
Storage Instructions
Allow leftovers to cool completely.
Store in airtight containers.
Refrigerate for up to 4 days.
The flavors often deepen after resting, making it even tastier the next day.
Freezing Instructions
Place cooled chicken in freezer-safe containers.
Freeze for up to 2 months.
Thaw overnight in the refrigerator before reheating.
Reheating Instructions
Stovetop Method
Heat in a pan over low to medium heat.
Add a small splash of water to loosen sauce if needed.
Stir gently until heated through.
Microwave Method
Heat in short intervals of 1 minute.
Stir between intervals for even heating.
Tips for Best Results
Use chicken thighs for juicier texture.
Do not burn garlic as it will make sauce bitter.
Cook sauce until it reaches glossy consistency.
Do not overcrowd pan when frying chicken.
Simmer long enough for glaze to fully develop.
Adjust sweetness gradually instead of adding too much honey at once.
Use fresh garlic and ginger for best aroma.
Nutritional Estimate Per Serving
Calories: 380 to 480
Protein: 28 to 35 grams
Carbohydrates: 25 to 35 grams
Fat: 15 to 22 grams
Sugar: 18 to 28 grams
Sodium: varies depending on soy sauce used
Honey Glazed Chicken delivers a perfect combination of sweet, savory, and tangy flavors with a sticky, glossy coating that clings to tender chicken pieces. It is simple to prepare yet rich in taste, making it a reliable dish for both everyday meals and special occasions.