Introduction
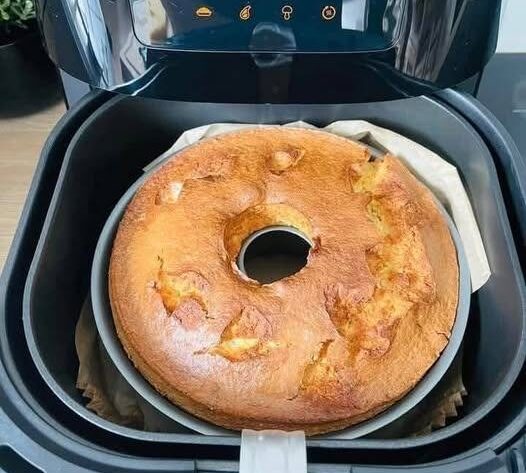
Creamy 3-Ingredient Yogurt Cake is a simple, soft, and delicately textured dessert that relies on just a few basic ingredients to create a smooth, custard-like cake. Despite its minimal ingredient list, the cake has a rich, creamy interior and a lightly golden top, making it feel much more elaborate than its simplicity suggests. It is often described as a cross between cheesecake and soufflé because of its airy yet creamy structure.
This cake works by using the natural protein structure of eggs combined with the moisture and tanginess of yogurt, which sets during baking into a soft, sliceable dessert. It is naturally lower in flour or completely flourless depending on the variation, making it a lighter alternative to traditional cakes.
Yogurt cake is especially popular for quick homemade desserts, minimal-ingredient baking, and light sweet treats that do not require complex preparation.
Yield
6 to 8 servings
Preparation Time
10 to 15 minutes
Baking Time
35 to 45 minutes
Cooling Time
1 to 2 hours
Total Time
Approximately 2 hours
Ingredients
Main Ingredients
1 cup plain yogurt (Greek yogurt or thick natural yogurt works best)
3 large eggs
3 to 4 tablespoons sweetener or sugar (adjust based on preference)
Optional Enhancements (not required but commonly used)
1 teaspoon vanilla extract for aroma
1 tablespoon cornstarch or flour for slightly firmer structure
1 teaspoon lemon juice or lemon zest for freshness
Pinch of salt to balance flavor
Equipment Needed
Mixing bowl
Whisk or hand mixer
Measuring cups and spoons
Small baking pan or loaf pan (6 to 7 inch recommended)
Parchment paper
Oven
Cooling rack
Step 1: Preparing the Baking Pan
Preheat the oven to 160°C to 170°C (320°F to 340°F).
Line a small baking pan with parchment paper. Make sure the paper covers the base and sides for easy removal after baking.
Lightly grease the parchment with a small amount of butter or oil. This helps prevent sticking and ensures smooth edges when the cake is removed.
Step 2: Mixing the Base Ingredients
In a mixing bowl, add yogurt.
Whisk it until smooth and creamy with no lumps.
Add eggs one at a time, mixing thoroughly after each addition.
The mixture should become smooth, pale, and slightly runny.
At this stage, the structure of Yogurt cake begins forming as eggs combine with yogurt to create a custard-like batter.
Step 3: Adding Sweetness and Flavor
Add sugar or sweetener gradually and mix until fully dissolved.
If using vanilla extract, lemon zest, or lemon juice, add them now.
Add a pinch of salt to enhance flavor balance.
If you want a slightly firmer cake texture, add cornstarch or flour and whisk until fully incorporated.
The batter should be smooth, thin, and pourable.
Step 4: Final Mixing and Texture Check
Whisk the batter for an additional 1 to 2 minutes to ensure everything is fully combined.
Avoid overmixing at high speed, as this can introduce too much air and affect the final texture.
The batter should be silky with no visible lumps.
Step 5: Pouring into Pan
Pour the batter into the prepared baking pan.
Tap the pan gently on the counter to release air bubbles.
The surface will appear smooth and slightly glossy.
Step 6: Baking Process
Place the pan in the preheated oven at 160°C to 170°C.
Bake for 35 to 45 minutes depending on oven strength.
During baking, the cake will puff slightly and then settle as it cools.
The top should turn lightly golden while the center remains slightly jiggly.
This soft center is what gives Yogurt cake its creamy texture.
Step 7: Checking Doneness
The cake is done when:
The edges are set and lightly golden
The center has a slight wobble but is not liquid
A toothpick inserted near the edge comes out clean
Do not overbake, as this can make the cake dry instead of creamy.
Step 8: Cooling Process
Turn off the oven and leave the cake inside with the door slightly open for 10 to 15 minutes.
This gradual cooling prevents cracking and sinking.
Remove the cake and allow it to cool at room temperature for at least 1 hour.
Then refrigerate for 1 additional hour for best texture and flavor.
Step 9: Texture Development
After chilling, the cake becomes firmer and creamier at the same time.
The flavor deepens, and the texture becomes smooth and custard-like.
Yogurt cake is known for its soft, melt-in-the-mouth consistency with a mild tang from yogurt and a gentle sweetness.
Step 10: Serving Suggestions
Serve chilled or slightly cool depending on preference.
It can be enjoyed plain as a light dessert.
You can top it with honey, fruit compote, or fresh berries.
It also pairs well with powdered sugar dusting or a drizzle of chocolate sauce.
For a richer dessert version, serve with whipped cream or ice cream.
Step 11: Storage Instructions
Store the cake in an airtight container in the refrigerator.
It stays fresh for up to 3 to 4 days.
Avoid leaving it at room temperature for long periods due to dairy content.
Step 12: Freezing Instructions
Wrap slices individually in plastic wrap.
Place in a freezer-safe container.
Freeze for up to 1 month.
Thaw in the refrigerator overnight before serving.
Step 13: Tips for Best Results
Use thick yogurt for creamier texture.
Do not overbake or the cake will lose softness.
Allow full chilling time for best structure.
Mix until smooth but avoid excessive air incorporation.
Use parchment paper for easy removal.
Adjust sweetness based on yogurt tanginess.
Flavor and Texture Profile
Yogurt cake has a soft, creamy, and slightly custard-like texture with a delicate tang from yogurt. The flavor is mildly sweet, smooth, and refreshing, making it feel light rather than heavy. The top is lightly golden while the interior remains soft and melt-in-the-mouth.
Nutritional Estimate Per Serving
Calories: 120 to 180
Protein: 6 to 9 grams
Carbohydrates: 8 to 15 grams
Fat: 5 to 10 grams
Sugar: varies depending on sweetener used
Yogurt cake is a quick, elegant, and minimal-ingredient dessert that delivers a creamy, satisfying texture with very little effort, making it ideal for both beginners and experienced bakers.